Installing uPVC windows with accuracy and efficiency is a skill that separates experienced window fitters from the rest. Whether you’re fitting a new uPVC window in a modern build or replacing an old frame in a renovation project, following a precise, methodical approach is crucial for long-term performance and customer satisfaction.
At TWR Group, we’ve been fabricating and supplying Eurocell uPVC windows to UK trade professionals for over two decades. Our fabrication expertise, combined with Eurocell’s advanced window technology, ensures that installers have access to products engineered for durability, thermal efficiency, and ease of installation.
This uPVC window installation guide provides a detailed, step-by-step breakdown of the process, from preparation and fixing methods to sealing and final checks – helping installers achieve a perfect, compliant fit every time.
Why precise uPVC window installation matters
Poor window installation can undermine even the best-quality product. A misaligned window frame or uneven line of silicone sealant can cause draughts, leaks, and even structural issues over time.
Correct uPVC window installation not only ensures a secure fit but also preserves the system’s energy efficiency, reduces call-backs, and upholds your professional reputation.
Every Eurocell uPVC window supplied by TWR Group is designed with installer convenience in mind, pre-fabricated for accuracy, featuring advanced multi-chambered profiles and durable seals. But even with premium products, performance depends on following the correct installation guide.
Preparing the working area
Before starting the actual installation process, preparation is essential for safety, accuracy, and a clean finish.
Step 1: Protect the surroundings
- Lay dust sheets around the working area
- Wear eye protection and gloves to avoid injury during removal or drilling
- Check the surrounding wall for cracks or moisture damage
Step 2: Remove the existing window
- Carefully remove the sash windows or opening lights from the old frame
- Cut through existing fixings using a reciprocating saw or angle grinder
- Pry out the old window frame gently to prevent damage to the surrounding wall
- Clean the aperture, removing stubborn marks, sealant residue, and debris
Step 3: Check the aperture
- Ensure the opening is square by measuring diagonally across corners
- Use a spirit level to check for uneven brickwork
- Make sure there’s enough clearance for the new uPVC frame and plastic packers
How to position the new uPVC frame correctly
Once the opening is prepared, positioning the new frame accurately is vital.
- Place the new uPVC window frame into the opening
- Use plastic packers at the bottom of the frame to level it
- Check both the sides of the window frame and the top of the frame for plumb and square
- The frame rebate should align evenly with the surrounding wall
- Temporarily secure with wedges before final fixing
Correct alignment is crucial – even a few millimetres of difference can lead to operational issues later, particularly with bay windows or large double glazing units.
Fixing the uPVC window frame
With the frame in position, you can move to secure it permanently.
Step 1: Drill fixing holes
- Use an appropriate drill bit for masonry or concrete
- Create holes approximately 150mm from each corner and then at 600mm intervals
Step 2: Insert frame fixings
- Fix through the sides into the wall structure using frame screws
- Avoid over-tightening, which can distort the uPVC frame
- Recheck alignment after each fixing with a spirit level
Step 3: Apply packers
- Use plastic packers behind each fixing point to maintain the shape of the new frame
- Packers help distribute the weight of the glass evenly and prevent deflection
- For replacement windows, double-check that the existing window frames or cills are still structurally sound before fixing
Glazing: fitting the glass units
The glazing stage requires care and precision to avoid stress on the glass panes or the side of the frame
Step 1: Prepare the frame
- Ensure the frame is clean and free from excess foam or debris
- Insert glazing packers at the bottom frame to support the glass units
Step 2: Insert the glass
- Lift the glass units carefully, considering the weight of the glass – use suction cups if necessary
- Place the edge of the glass onto the packers, checking that it sits square within the frame rebate
Step 3: Fit glazing beads
- Clip the glazing beads into place, starting with the shorter sides first
- Finish with the longer sides to ensure an even fit and smooth corner finish
Correct use of glazing beads ensures security, prevents rattling, and maintains thermal performance.
Sealing and finishing touches
Once glazed, it’s time to seal and finish the installation to make it weatherproof and visually clean.
Step 1: Apply silicone sealant
- Apply a continuous line of silicone or line of sealant around the edge of the frame
- Maintain even pressure for a neat finish
- Use a tool or gloved finger to create a smooth bead.
Step 2: Check trickle vents
- If the new window includes trickle vents, ensure they are open and unobstructed
- Proper ventilation supports condensation control and long-term performance
Step 3: Remove excess foam
- Trim any excess foam that has expanded around the frame edges
- Clean the uPVC frame and glass with a non-abrasive cleaner.
Following manufacturer instructions for lasting performance
Every Eurocell uPVC window fabricated by TWR Group is engineered to meet high standards of thermal performance and structural strength. However, long-term reliability depends on following the manufacturer’s guidance during installation.
Eurocell’s official window installation documentation outlines correct screw types and fixing distances, recommended silicone sealant and glazing bead systems, approved frame fixings and packers and proper drainage and trickle vent placement
Adhering to these instructions ensures the installation maintains its energy efficiency and complies with Building Regulations Part L and FENSA standards.
Checking operation and final quality inspection

Once the window is secured and sealed, perform a detailed final check.
- Open and close all sashes to ensure smooth operation
- Verify locks, handles, and hinges are secure and aligned
- Confirm the line of silicone is consistent and watertight
- Inspect from both inside and outside for gaps or uneven joints
- Clean off any stubborn marks or adhesive residue.
A precise finish not only looks professional but also reassures the homeowner that the installation meets trade standards.
Tips for handling different window types
Replacement windows
When fitting replacement windows, inspect the old frame area carefully
- If the existing window opening is uneven, use foam and plastic packers to achieve a square fit
- Replace damaged sills or brickwork before installing the new frame
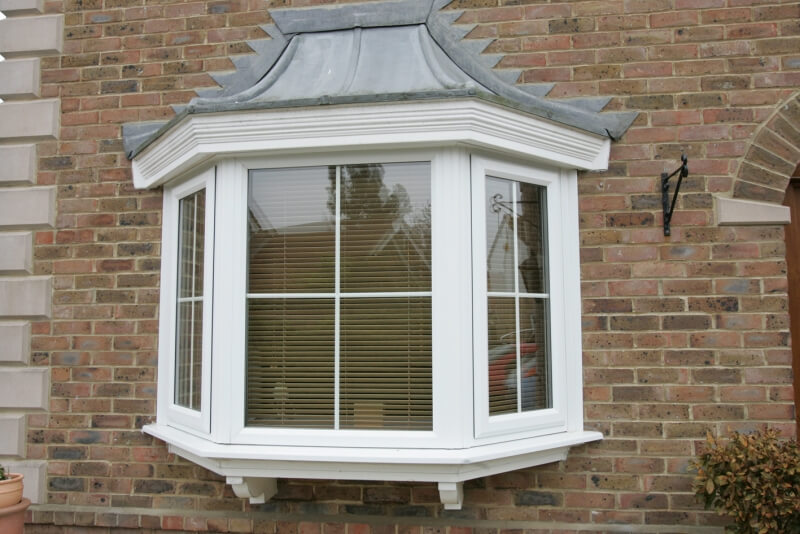
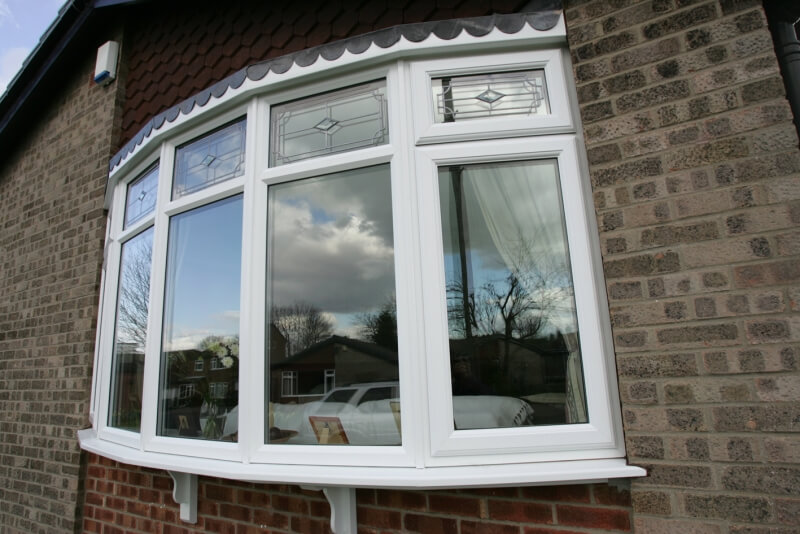
Bay windows
- Support the structure adequately – the weight of the glass and side of the frame can cause sagging if not reinforced
- Check that mullions and joints are sealed with a continuous line of sealant.
Sash windows
When replacing sash windows with a new uPVC window, measure carefully to maintain aesthetic proportion.
- Use slimline uPVC frames where possible to maximise light
- Follow the same alignment principles – level bottom frame, square sides, even seal
Tools and materials checklist for uPVC window installation
Every successful uPVC window installation starts with the right tools: Essential hand tools, tape measure, spirit level, drill bit set, screwdriver, pry bar or chisel, hammer, utility knife, fixings and materials, frame fixings / screws, plastic packers, expanding foam, silicone sealant, dust sheets, glazing beads, rubber mallet, eye protection. Having all these items ready prevents delays and helps maintain a smooth workflow.
Why trade installers choose TWR Group for uPVC window supply
For more than 25 years, TWR Group has been a trusted trade fabricator and supplier of Eurocell uPVC windows, doors, and associated products across the UK.
Trade professionals rely on us for:
- Consistent fabrication accuracy using Eurocell profiles
- Quick turnaround and reliable delivery
- Competitive trade pricing
- Expert technical support and installation guidance
- A wide range of styles including casement, tilt-and-turn, and flush sash
Our Eurocell uPVC window systems are engineered for performance, with multi-chambered frames for superior insulation and easy installation on-site.
Troubleshooting on-site: practical tips
Sometimes site conditions don’t go as planned. Here’s how to address common challenges:
- Uneven brick reveals – Use extra packers and foam to fill voids and maintain square
- Cold bridging – Always insulate the frame rebate and seal joints to prevent heat loss
- Scratched uPVC frame – Use a soft cloth with warm soapy water; avoid abrasives
- Noisy operation – Adjust hinges and recheck sides of the window frame for contact points
- Condensation inside glass units – Indicates seal failure; contact supplier for replacement glass panes
These small adjustments help ensure professional results and a satisfied client.
How does correct installation improve energy efficiency?
A well-installed uPVC window can significantly improve home energy efficiency. Poor sealing or incorrect alignment allows air leakage, reducing the benefits of double glazing.
According to the Energy Saving Trust, properly installed modern uPVC windows can reduce heat loss by up to 20% compared with old single-glazed units. That’s why ensuring a perfect seal and correct line of silicone with no shrinkage is essential.
Key takeaways
- Preparation and accuracy are essential for a high-quality uPVC window installation
- Always level and square the new frame before fixing
- Use plastic packers, correct frame fixings, and quality silicone sealant
- Follow manufacturer instructions to protect warranties and ensure compliance
- A clean, consistent finish with a smooth bead defines professional workmanship
Your trusted partner for uPVC window supply
At TWR Group, we understand the demands of trade installation and the importance of reliable supply. Our partnership with Eurocell means installers can trust in both product quality and fabrication precision.
Whether you’re fitting replacement windows, bay windows, or sash windows, our technical team is here to support your projects with expert advice, accurate specifications, and prompt delivery.
Contact the TWR Group trade team today to discuss your next project or open a trade account. Let’s make every installation a success, first time, every time.
FAQs
Q: Can I reuse the old frame when fitting a new uPVC window?
It’s not recommended. Always remove the old frame to ensure the new frame aligns properly and provides full insulation performance.
Q: What’s the best sealant for uPVC windows?
Use a high-quality, low-modulus silicone sealant approved for uPVC to maintain flexibility and weatherproofing.
Q: How do I know if my window is square?
Measure diagonally across corners – if both measurements are equal, the window is square.
Q: Should I use expanding foam?
Yes, but sparingly. It provides insulation and support but can distort the uPVC frame if overused.
Q: How long does a uPVC window installation take?
Typically, 1–2 hours for a standard casement window, depending on size and site conditions.